How to Draw and Label a Human Respiratory System Diagram, Step by Step
The human respiratory system diagram comes up in Class 10 Biology (Life Processes, respiration). It traces the path air takes from the nose down to the lungs. The steps below draw the outline of the head and chest first, then each air passage in order.
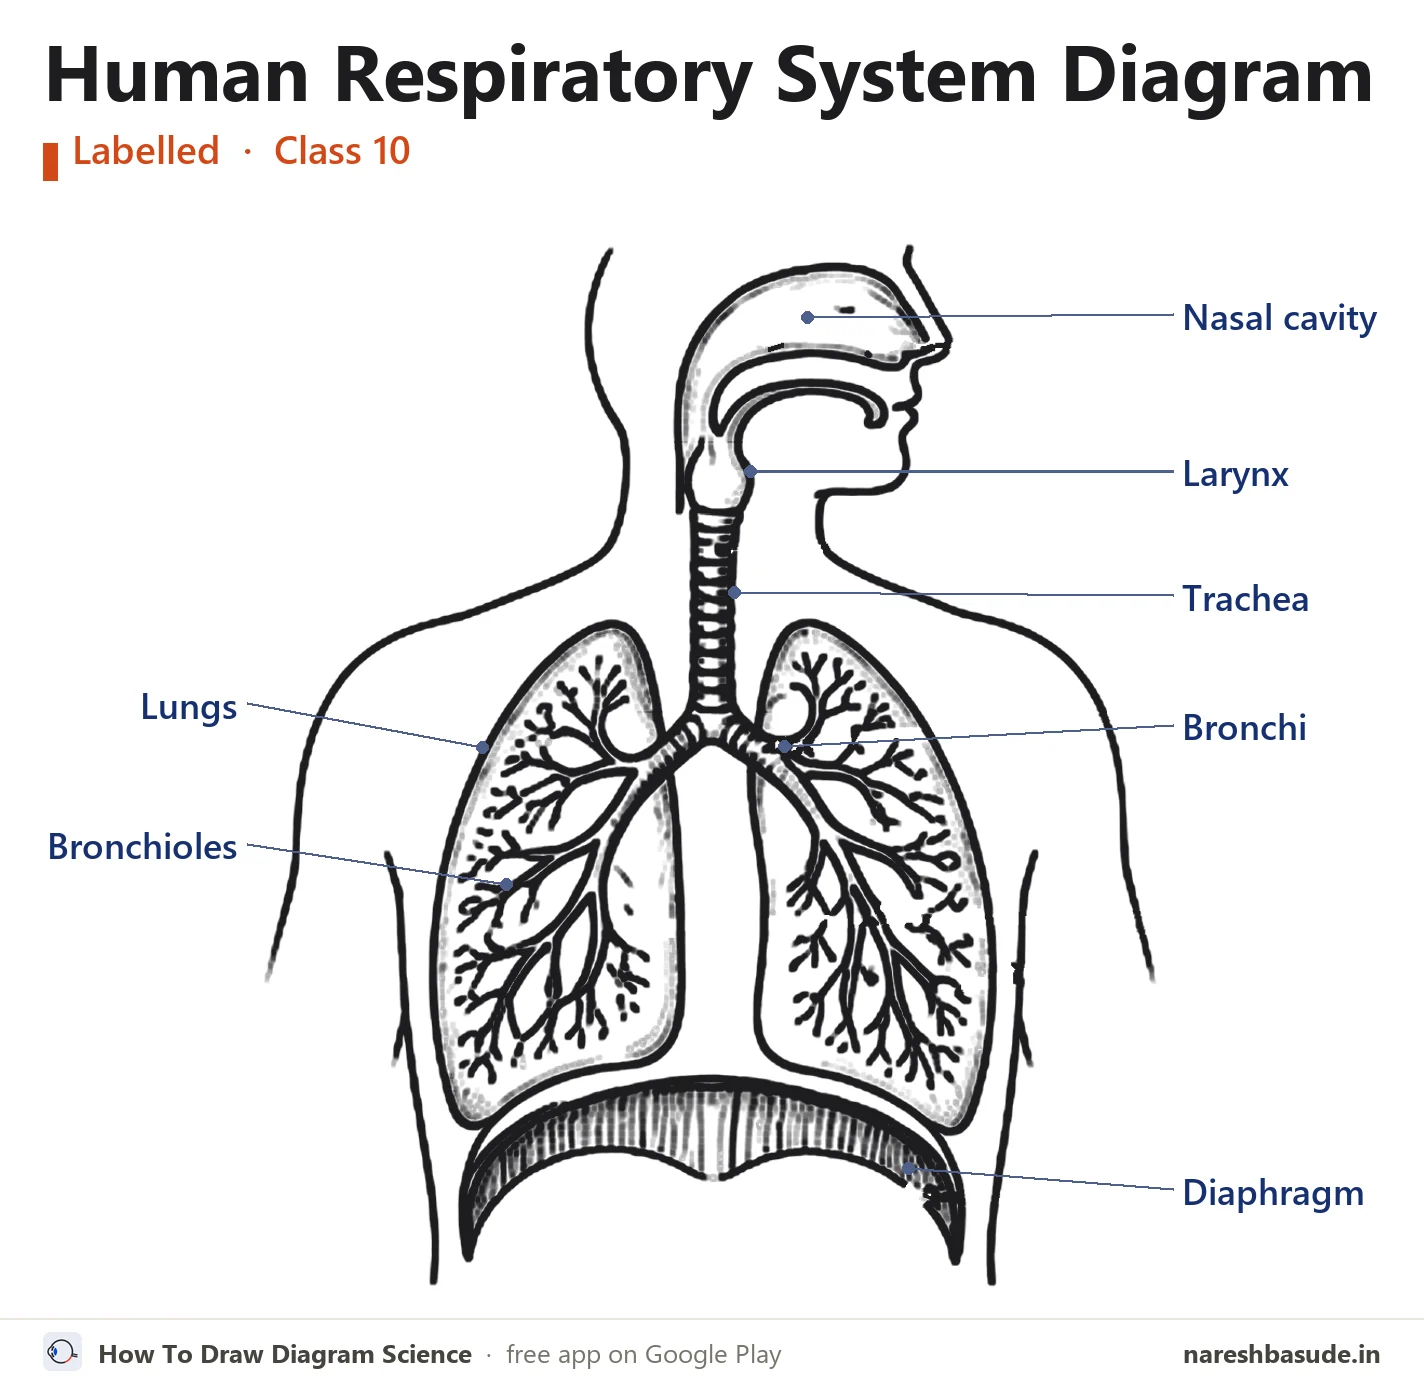
The finished human respiratory system diagram with all 7 parts labelled. The steps below build it up one part at a time.
What the human respiratory system does
Air enters through the nostrils into the nasal cavity, passes the pharynx and larynx, and goes down the trachea. The trachea splits into two bronchi, which branch into smaller bronchioles inside the lungs. These end in tiny air sacs, the alveoli, where gases are exchanged. The diaphragm, a dome of muscle under the lungs, helps us breathe.
Draw it in 11 steps
Use a sharp pencil and draw lightly at first. In every picture, red is what to draw in that step and grey is what you have already drawn.
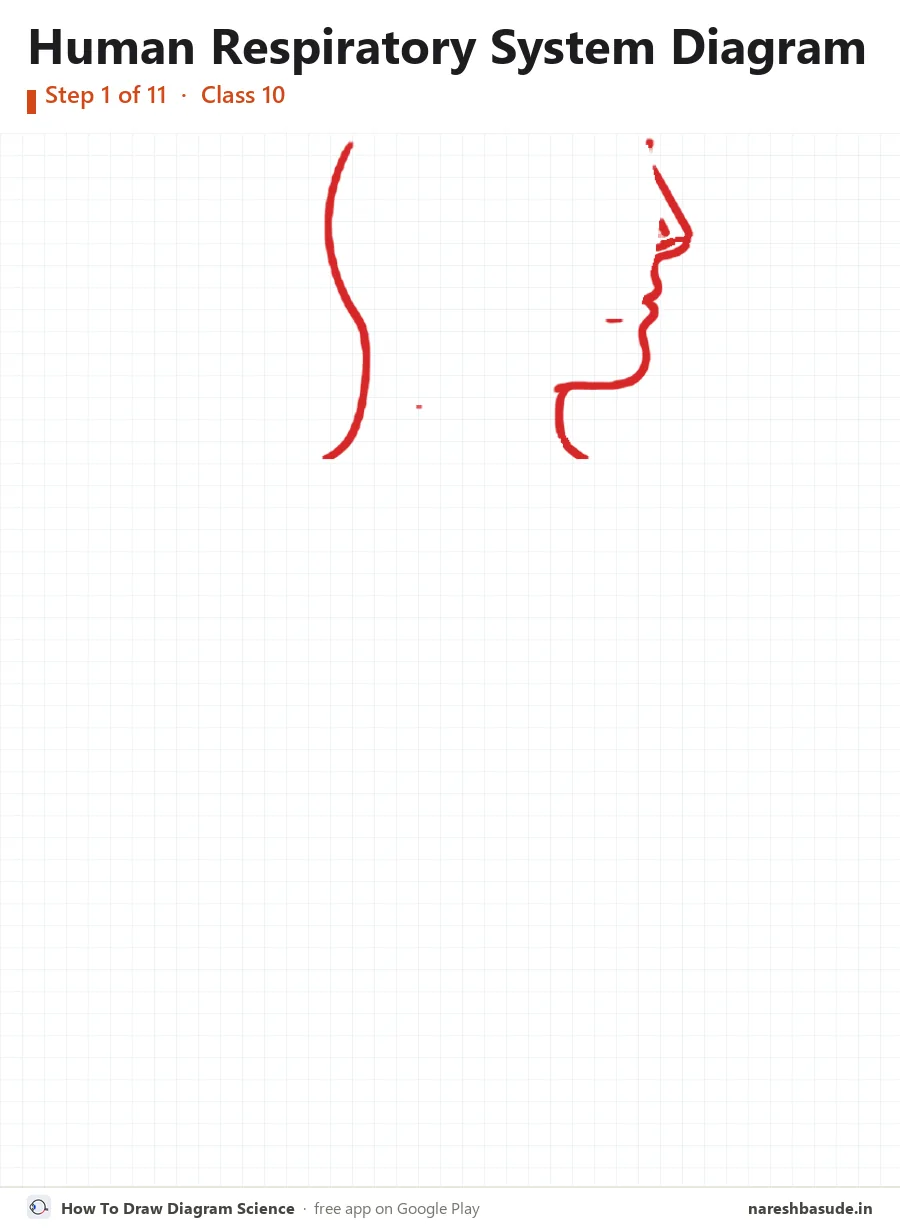
Head and neck
Start with the outline of the head from the side: the back of the head and neck on the left, and the face with nose, lips and chin on the right.
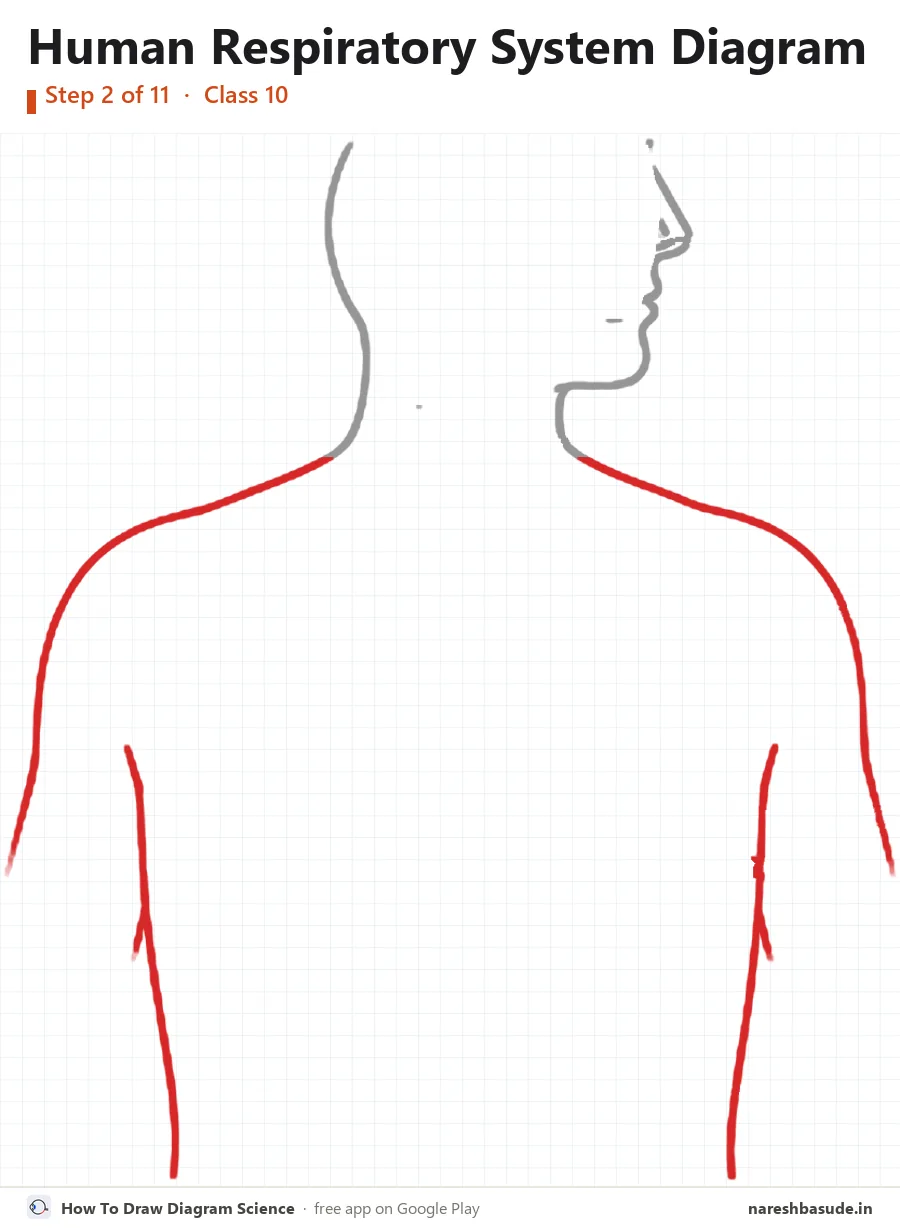
Shoulders and chest
From the neck, draw the shoulders sloping down on both sides, and the two lines of the chest wall going down.
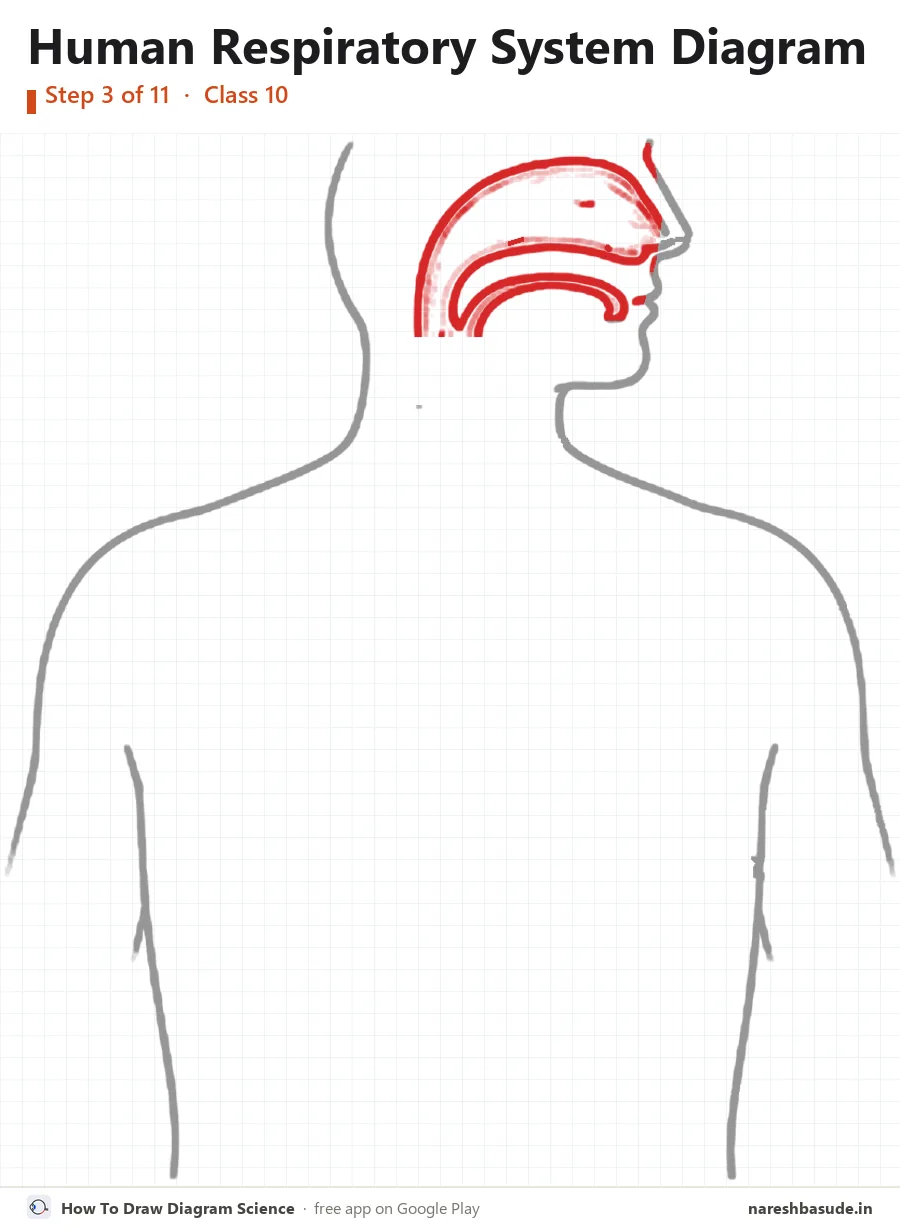
Nasal cavity
Inside the head draw the nasal cavity: a curved passage that starts behind the nose, runs back, and turns down into the throat.
Parts drawn: Nasal cavity, Pharynx
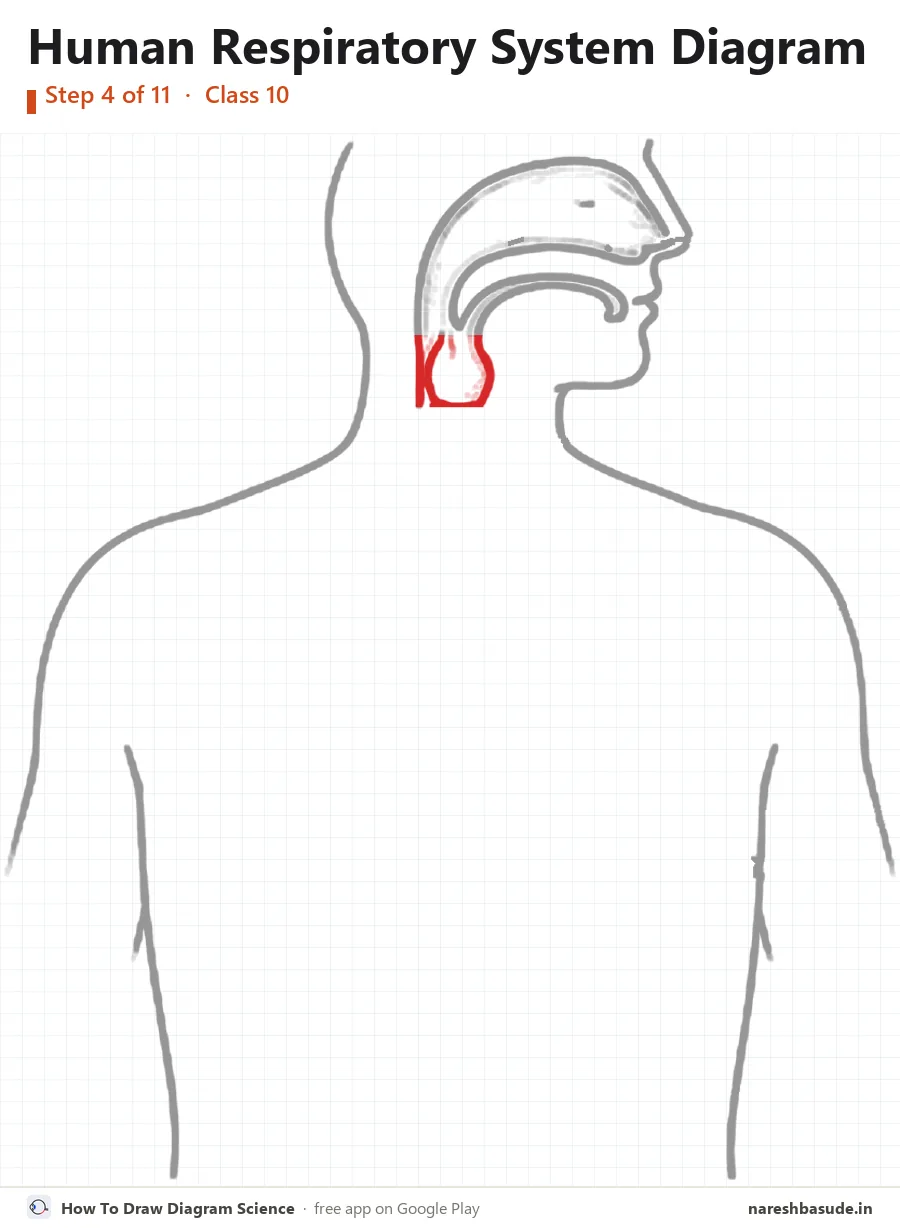
Larynx
Where the throat meets the windpipe draw a small rounded bulge: the larynx (voice box).
Parts drawn: Larynx
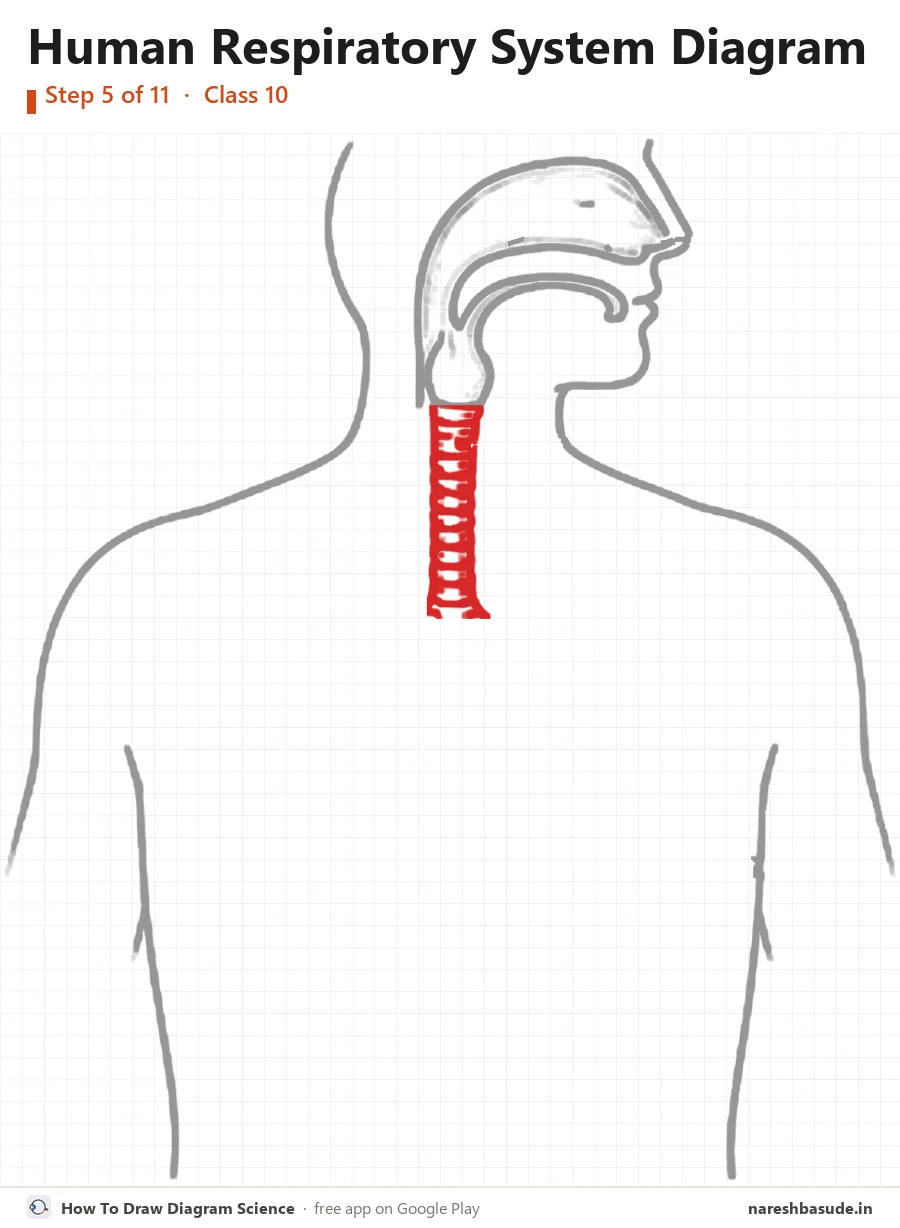
Trachea
Draw the windpipe going straight down the middle, with rings across it one below the other.
Parts drawn: Trachea
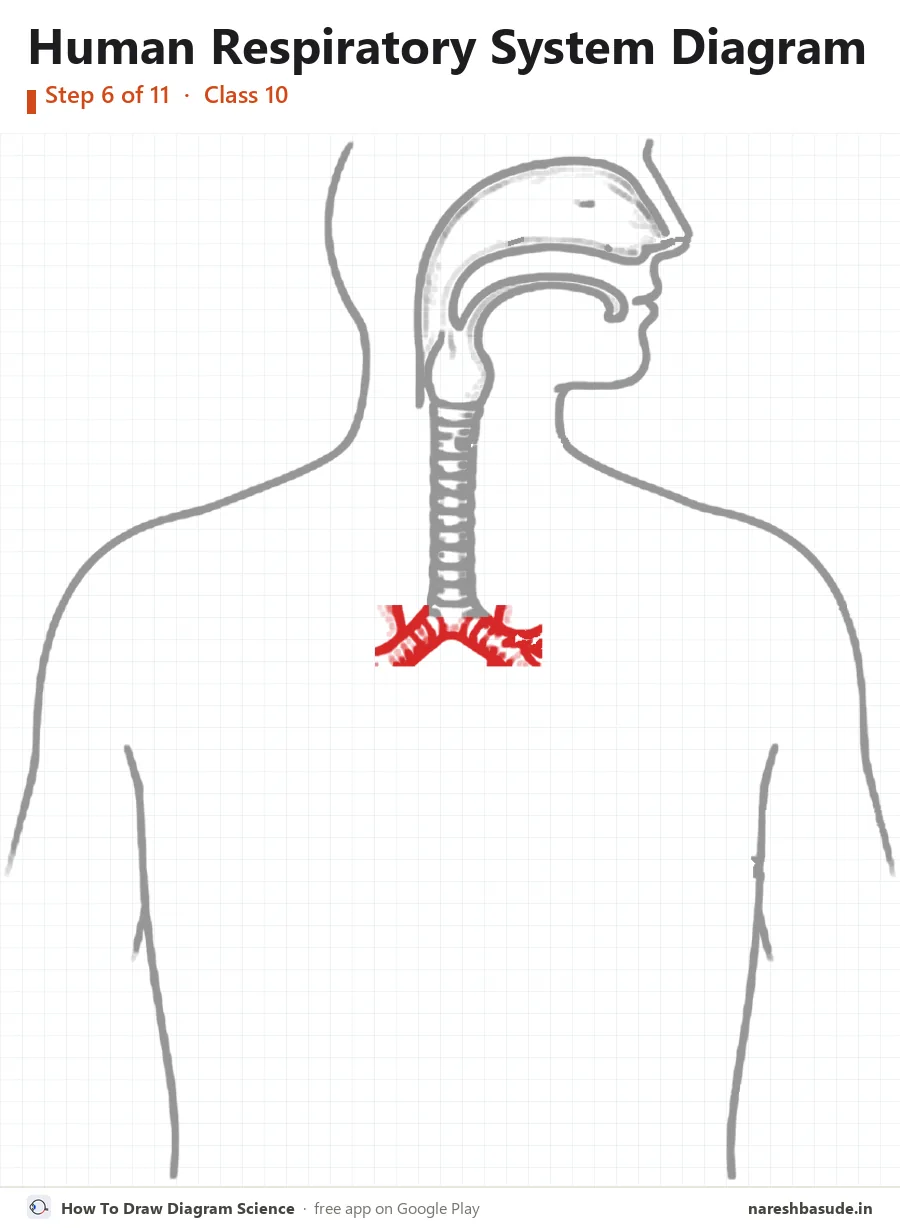
Bronchi
At the bottom of the trachea split it into two short tubes, one going to each lung: the bronchi.
Parts drawn: Bronchi
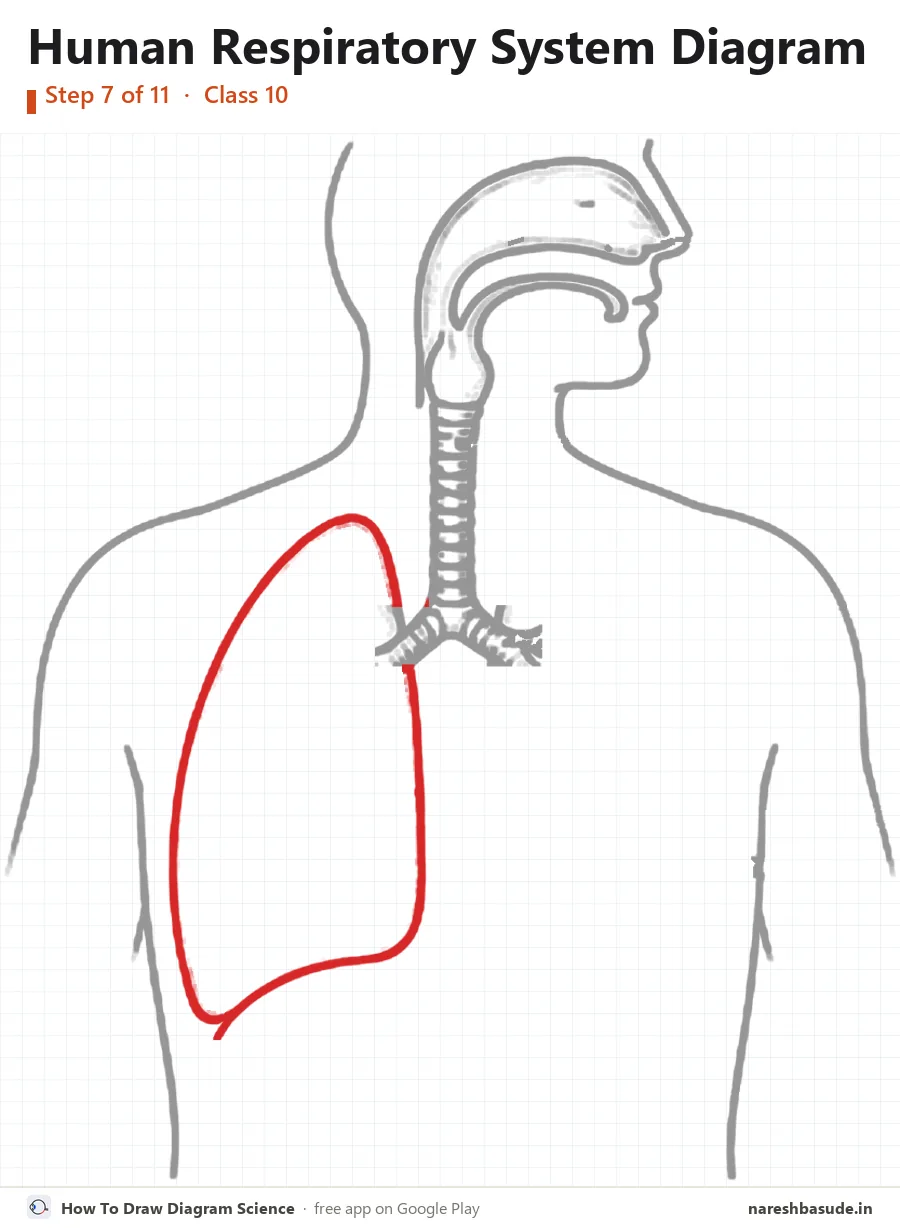
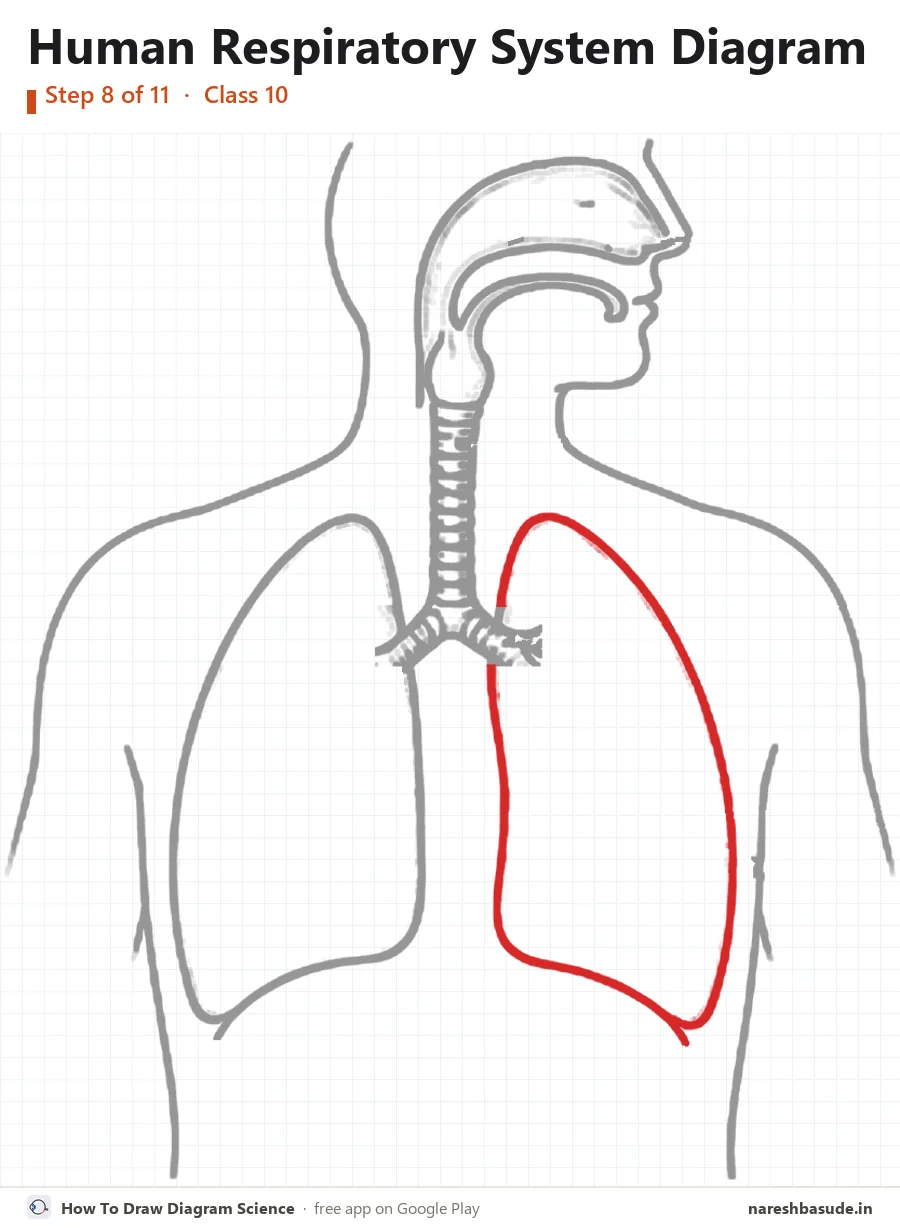
Lung on the left
Draw the lung on the left: a tall rounded shape, narrow at the top and wide at the bottom, with a flat side facing the trachea.
Parts drawn: Lungs
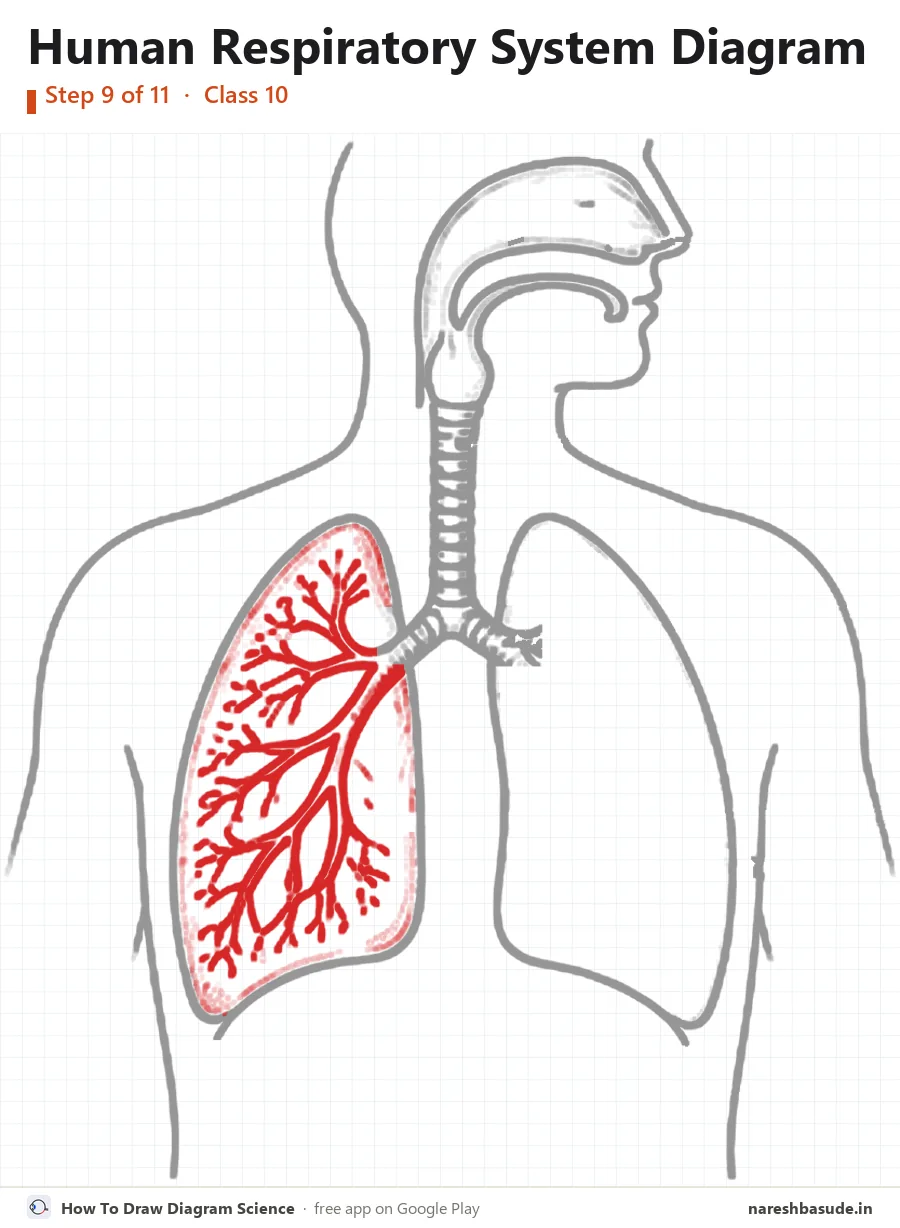
Lung on the right
Draw the lung on the right the same way, next to the trachea.
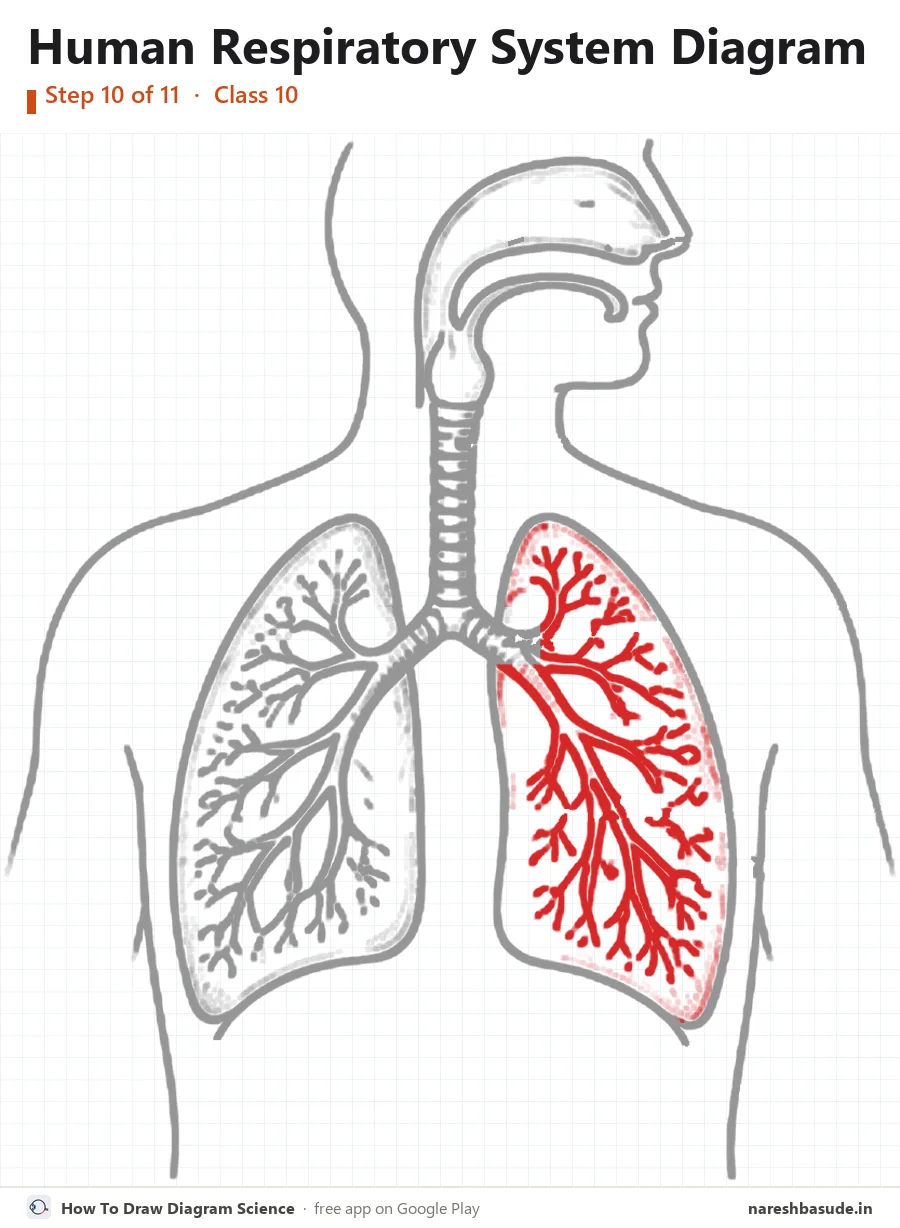
Bronchioles: left lung
Inside the left lung, draw the bronchus branching again and again into thinner tubes, like an upside-down tree.
Parts drawn: Bronchioles
Bronchioles: right lung
Do the same inside the right lung.
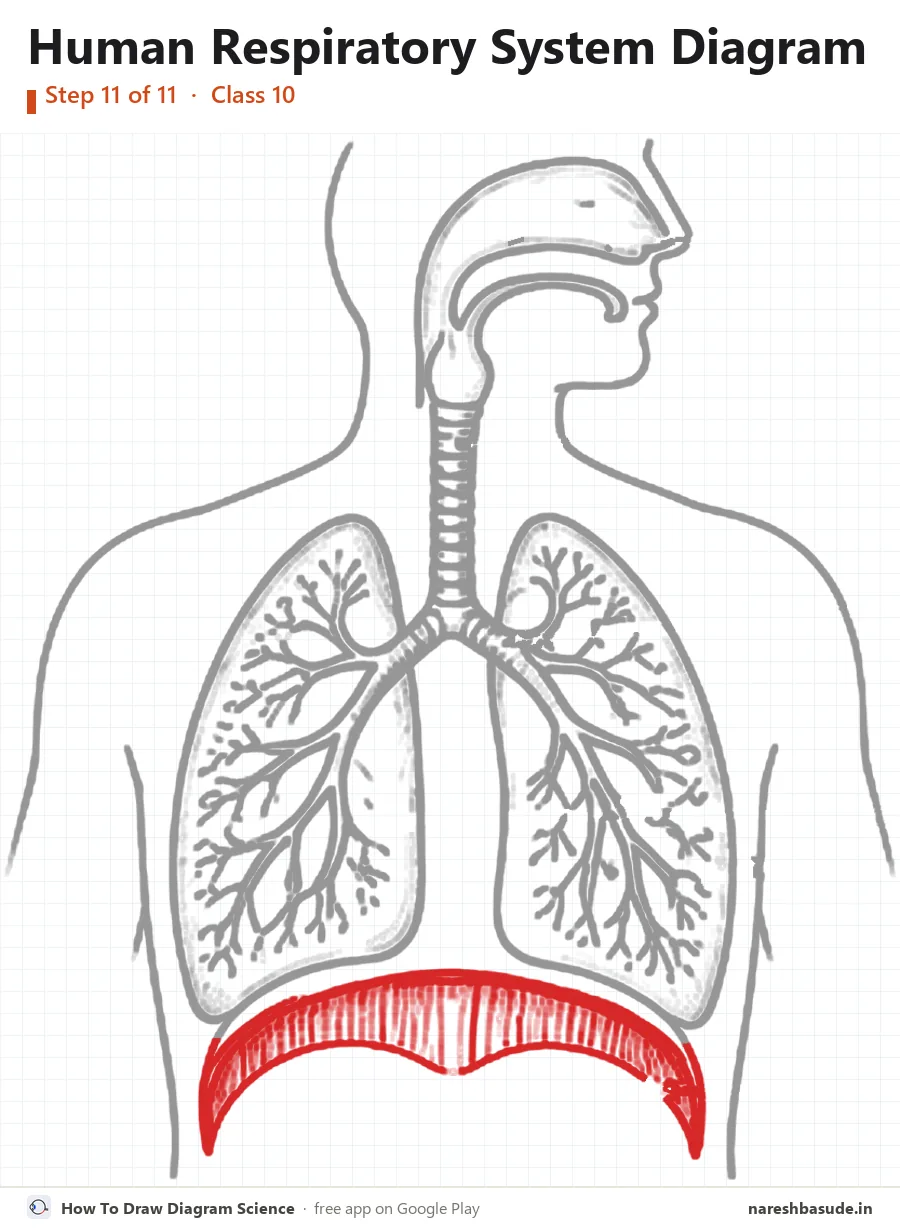
Diaphragm
Under both lungs draw the diaphragm: a curved sheet of muscle, like a dome, with fine lines across it.
Parts drawn: Diaphragm

Parts to label (7) and what each one does
- Nasal cavity Air comes in through the nostrils. Fine hairs and mucus here filter it, and it is warmed and moistened.
- Larynx The voice box, at the top of the trachea.
- Trachea The windpipe. Rings of cartilage stop it from collapsing, so air can always pass.
- Bronchi The two branches of the trachea, one going into each lung.
- Lungs The two spongy organs where oxygen passes into the blood and carbon dioxide passes out, through the walls of millions of alveoli.
- Diaphragm The dome-shaped muscle under the lungs. When it flattens, the chest gets bigger and air is pulled in.
- Bronchioles Smaller and smaller branches of the bronchi inside the lungs. They end in tiny air sacs, the alveoli.
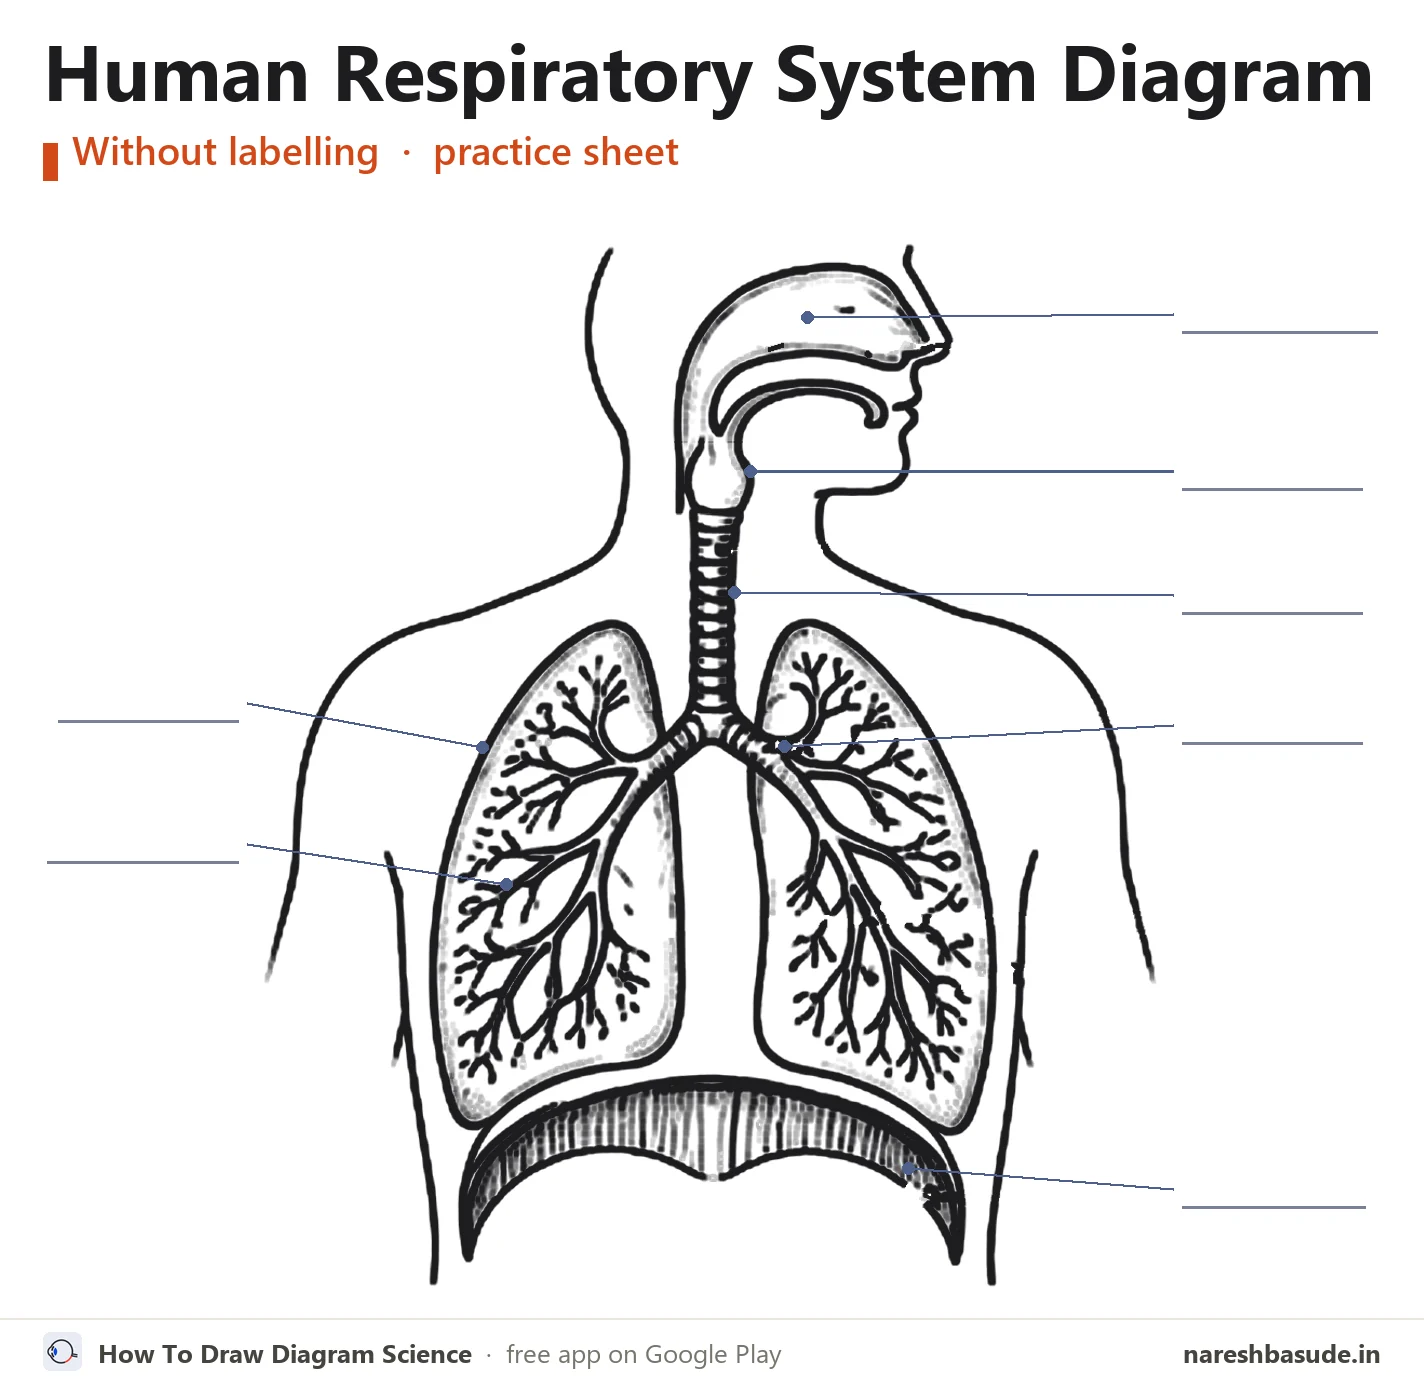
Write each name on the side of the diagram, joined to its part with a straight line. Keep the lines from crossing.
Human Respiratory System diagram without labelling (practice sheet)
The same diagram with the label lines but no names (an unlabelled diagram). Write each part's name on its line, then check your answers against the labelled diagram at the top.
Download free PDF (A4, 3 pages)
Page 1: the labelled diagram. Page 2: this practice sheet with a word bank of all 7 parts. Page 3: all 11 drawing steps on one page.
Exam tips
- Draw rings across the trachea. They are rings of cartilage that keep it from collapsing.
- Let the bronchioles branch again and again, like an upside-down tree.
- Finish with the dome-shaped diaphragm under both lungs.
Common mistakes
- Drawing the trachea as a plain tube with no rings.
- Mixing up the bronchi (the two main branches) and the bronchioles (the thin branches inside the lungs).
- Forgetting the diaphragm.
Exam questions on the human respiratory system diagram
QuestionDraw a diagram of the human respiratory system and label: trachea, bronchi, bronchioles, lungs and diaphragm.
Draw the nasal cavity and the larynx at the top, then the trachea going down the middle. It splits into two bronchi, one into each lung, and these branch into bronchioles. The dome-shaped diaphragm goes under both lungs.
QuestionHow are the alveoli suited for the exchange of gases?
There are millions of them, so their total surface is very large (about 80 square metres if spread out). Their walls are very thin and covered in blood capillaries, so oxygen and carbon dioxide pass across quickly.
Questions students ask
Why does the trachea have rings?
The rings are made of cartilage. They keep the windpipe open so it does not collapse when there is less air in it.
Where does the exchange of gases take place?
In the alveoli, the tiny air sacs at the ends of the bronchioles.
What does the diaphragm do?
When we breathe in, it flattens and moves down, making the chest cavity bigger so air is drawn into the lungs.
Practise it on your phone
These steps come straight from the free Android app How To Draw Diagram Science. In the app you can view the human respiratory system with every part named, learn to draw it step by step on a numbered grid, take a quiz on the parts and label it yourself.


